
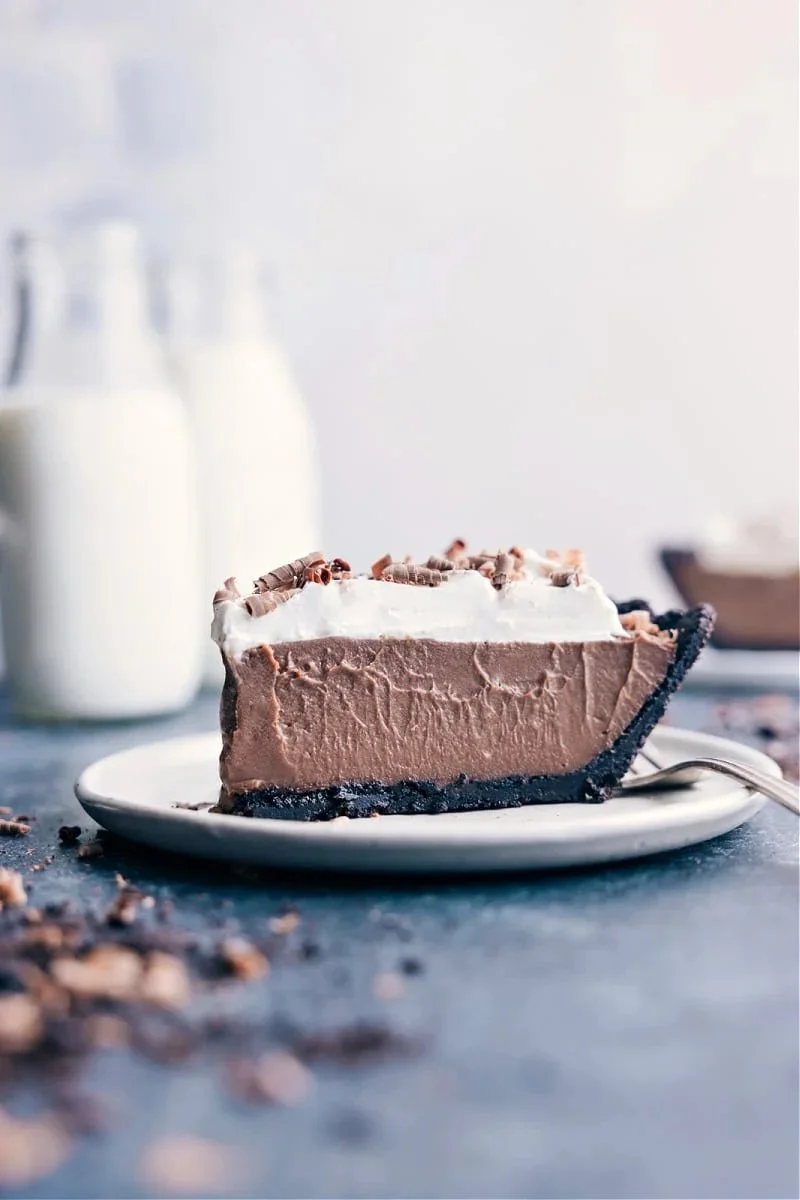
Chocolate Cream Pie is a delightful and indulgent dessert that envelops your senses in a wave of rich, velvety chocolate. With its beautifully smooth filling nestled in a crisp, Oreo cookie crust, it’s the kind of treat that evokes nostalgia and comfort in every bite. This recipe is incredibly easy to follow with its simple step-by-step directions, making it a perfect choice for family gatherings, celebrations, or just a satisfying dessert after a long day.
Ingredients
To create your mouth-watering Chocolate Cream Pie, you’ll need the following ingredients:
- 4 tablespoons unsalted butter (melted) for that rich flavor
- 24 Oreos (or chocolate sandwich cookies) that bring in a crispy crunch and deep chocolate essence
- 1/16 teaspoon salt, just enough to enhance the flavors
- 3/4 cup granulated sugar to sweeten things up
- 1/2 teaspoon salt for balance
- 1/4 cup cornstarch to thicken the filling to that silky pudding-like consistency
- 2 cups whole milk for creaminess
- 1 cup heavy cream for the luxurious topping
- 4 large egg yolks to add richness
- 2 tablespoons unsalted butter for extra flavor
- 2 (4-ounce) packets semi-sweet baking bars providing that decadent chocolate taste
- 2 teaspoons vanilla extract for aromatic depth
- 1 cup heavy cream to whip for the topping
- 4 tablespoons powdered sugar to sweeten the cream
- 1/2 teaspoon vanilla extract for the whipped topping
- 1 chocolate bar (optional) for garnishing your creation
Step-by-Step Directions
Begin your Chocolate Cream Pie masterpiece by preheating your oven to 350°F (175°C). Grease a 9-inch pie pan to prepare for the delicious filling.
-
Melt 4 tablespoons of unsalted butter and let it cool for about 5 minutes.
-
In a blender or food processor, crush the 24 Oreos into fine crumbs, measuring out 1-3/4 cups.
-
In a bowl, mix the Oreo crumbs, 1/16 teaspoon salt, and the cooled melted butter until fully combined.
-
Transfer this crumb mixture to your prepared pie pan and press it firmly into the sides and bottom, using your fingers first and then a flat measuring cup for an even surface.
-
Bake the crust for 9 minutes, then allow it to cool completely.
Next, let’s create the rich filling!
-
Chop the semi-sweet baking bars and set aside.
-
In a pot off the heat, mix the 3/4 cup granulated sugar, 1/2 teaspoon salt, and 1/4 cup cornstarch, whisking them together.
-
Add the egg yolks, then slowly whisk in the 2 cups of whole milk and 1 cup of heavy cream until you achieve a smooth mixture.
-
Place the pot on medium-low heat, whisking occasionally and scraping the sides and bottom to prevent sticking. Gradually heat this mixture.
-
As it starts to thicken, whisk constantly. When large bubbles form on the surface, reduce the heat slightly and whisk continuously for an additional minute until it truly resembles pudding.
-
Remove from heat, whisking for another minute before adding the 2 tablespoons of butter. Whisk until melted, then stir in the chopped chocolate until the mixture is velvety and smooth. Finally, add in the 2 teaspoons of vanilla extract.
-
Carefully pour this luscious filling into your cooled Oreo crust, smoothing out the top with a spatula. To prevent an unwanted skin from forming, cover it with plastic wrap.
-
Refrigerate your pie for at least 8 hours or overnight until it’s set.
For the finishing touches, let’s whip up some cream!
-
In a mixing bowl, combine 1 cup of heavy cream, 4 tablespoons of powdered sugar, and 1/2 teaspoon of vanilla extract.
-
Start with 2 tablespoons of powdered sugar and gradually increase it to your desired sweetness level.
-
Using a hand mixer, begin mixing on low speed, then increase to high until medium-to-stiff peaks form, which should take about 2–4 minutes. Be careful not to overbeat.
-
Spread this fluffy whipped cream over the chilled pie, and if desired, garnish with chocolate shavings crafted with a vegetable peeler for an elegant touch.
-
For clean slices, warm a sharp knife under hot water, dry it, and slice your pie. Repeat this process for each cut for a beautiful presentation.
Tips & Tricks
To enhance your Chocolate Cream Pie, consider adding a pinch of espresso powder to the filling to deepen the chocolate flavor. Alternatively, incorporating a layer of banana slices into the pie before adding the filling can provide a delightful twist. When making the whipped cream, use chilled equipment for the best texture and stability.
Serving Suggestions & Pairings
This Chocolate Cream Pie shines at any occasion, but particularly as a show-stopping dessert at birthday parties or family gatherings. Pair it with fresh berries for a refreshing contrast, or serve it alongside a scoop of vanilla ice cream for even more indulgence. A robust cup of coffee or a glass of milk complements the rich chocolate beautifully.
Nutritional Information
Each slice of this Chocolate Cream Pie contains approximately 350 calories, including carbohydrates, fats, and proteins. While it’s a rich treat, enjoying a slice in moderation can fit into a balanced diet. Remember to complement your dessert with nutrient-dense foods throughout the day!
Storing Tips & Variations
To store your Chocolate Cream Pie, keep it covered in the refrigerator for up to 3 days. If you want to extend its life, you can freeze it without the whipped topping for up to 2 months. Allow it to thaw in the refrigerator overnight before serving. Consider variations such as adding mint extract for a refreshing flavor or using different types of chocolate bars for a unique twist.
Conclusion
Now that you have the recipe for a sumptuous Chocolate Cream Pie, I encourage you to give it a try! This delightful dessert is sure to please anyone with a sweet tooth and create lasting memories. Please share your experiences and any modifications you make; I’d love to hear how your pie turns out!
FAQs
1. Can I make the crust in advance?
Absolutely! You can prepare the Oreo crust a day ahead, just store it in an airtight container at room temperature.
2. How do I prevent the filling from being too runny?
Ensure you cook the mixture until it thickens properly and reaches a pudding-like consistency before cooling.
3. Is it possible to use other types of cookies for the crust?
Certainly! You can substitute with other chocolate cookies or even graham crackers; just note that the flavor will change slightly.
4. Can I use milk alternatives?
Yes, you can substitute cow’s milk with almond milk or oat milk, but the texture may differ slightly.
5. How long can I keep the pie in the fridge?
The pie can be safely stored in the refrigerator for about 3 days, but best enjoyed fresh!

Chocolate Cream Pie
Ingredients
Method
- Preheat your oven to 350°F (175°C) and grease a 9-inch pie pan.
- Melt 4 tablespoons of unsalted butter and let it cool for about 5 minutes.
- Crush the 24 Oreos into fine crumbs in a blender or food processor.
- Mix the Oreo crumbs, 1/16 teaspoon salt, and the cooled melted butter until fully combined.
- Transfer mixture to the pie pan, pressing it firmly into place, and bake for 9 minutes, then let cool completely.
- Chop the semi-sweet baking bars and set aside.
- In a pot off the heat, mix 3/4 cup sugar, 1/2 teaspoon salt, and 1/4 cup cornstarch.
- Add egg yolks, then slowly whisk in 2 cups of whole milk and 1 cup of heavy cream until smooth.
- Place on medium-low heat, whisking occasionally. Gradually heat the mixture.
- As it thickens, whisk constantly. When large bubbles form, reduce heat and whisk for an additional minute.
- Remove from heat, whisk in 2 tablespoons of butter and the chopped chocolate until smooth, then add 2 teaspoons of vanilla extract.
- Pour filling into the cooled Oreo crust, smoothing the top and covering with plastic wrap.
- Refrigerate for at least 8 hours or overnight until set.
- In a mixing bowl, combine 1 cup heavy cream, 4 tablespoons powdered sugar, and 1/2 teaspoon vanilla extract.
- Mix on low speed, then increase to high until medium-to-stiff peaks form, about 2-4 minutes.
- Spread the whipped cream over the chilled pie and garnish with chocolate shavings if desired.
- Warm a sharp knife under hot water, dry it, and slice the pie for clean cuts.




Leave a Reply