
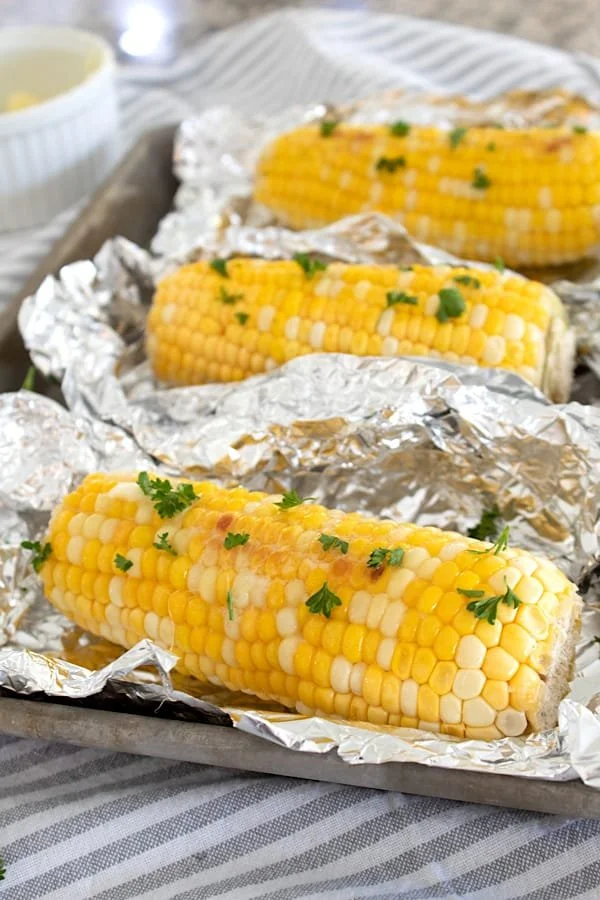
Oven Roasted Corn on the Cob is a delightful dish that evokes the essence of summer. Its vibrant yellow kernels glisten like sunshine, sending out a mouth-watering aroma that can transport you to summer barbecues and family gatherings. This recipe is incredibly easy to follow and offers a simple yet satisfying way to enjoy fresh corn. It’s perfect for any occasion, whether you’re whipping up a quick weeknight dinner or hosting a festive cookout. With this step-by-step guide, you’ll find yourself savoring sweet, juicy corn cooked to perfection, making it a comforting and nostalgic treat.
Ingredients
To achieve the best results with Oven Roasted Corn on the Cob, you’ll need just a few simple yet flavorful ingredients:
- 4 ears of corn: Fresh, plump, and bursting with sweetness, these juicy ears offer a summery crunch that’s hard to resist.
- 4 tbsp butter: Creamy and rich, this adds a decadent layer that enhances the corn’s natural flavor.
- Salt and pepper to taste: These aromatic seasonings will elevate your dish, creating a harmonious balance of flavors.
- Parsley for garnish (optional): Bright green and fresh, parsley adds a beautiful pop of color and a hint of herbal aroma to your finished dish.
Step-by-Step Directions
-
Preheat your oven to 400 degrees Fahrenheit, preparing it for the perfect roast that will coax out the sweetness of the corn.
-
Prepare the corn: Take each ear of corn and place it in a foil ‘pouch.’ With the corn nestled in the foil, rub the tops of each ear with 1 tablespoon of butter, ensuring it coats the corn evenly. If desired, sprinkle with salt and pepper, but be cautious of oversalting if your butter is already salted.
-
Seal the foil: Carefully fold the foil over each ear of corn to create a secure pouch that will trap the luscious steam inside, allowing the kernels to cook thoroughly.
-
Bake: Place the sealed pouches on a sheet pan or in a casserole dish. Bake in the preheated oven for about 10 minutes.
-
Turn the corn: After the initial time, remove the pan from the oven and turn each corn pouch to the opposite side. Reseal and return to the oven for another 10-15 minutes, or until the corn reaches your desired level of doneness.
-
Garnish and serve: Once done, carefully unwrap the pouches; beware of the hot steam! Allow them to cool slightly, then garnish with parsley if desired. Serve and enjoy this simple yet elegant dish!
Tips & Tricks
- Fresh is best: Use fresh corn for maximum sweetness and flavor. Look for ears with bright green husks and plump, moist kernels.
- Add flavor: Experiment with different seasonings. Try adding garlic powder, paprika, or even a squeeze of lime for a zesty twist.
- Grill option: If you prefer cooking outdoors, these corn pouches can be grilled instead of baked. Just follow the same steps on a preheated grill.
Serving Suggestions & Pairings
Oven Roasted Corn on the Cob pairs beautifully with grilled meats like chicken or steak, and it’s a must-have at summer barbecues. It can also stand alone as a delightful vegetarian side dish. Serve it alongside fresh salads, creamy coleslaw, or traditional baked beans for a complete meal. Don’t forget to provide extra melted butter for those who want to indulge!
Nutritional Information
One ear of corn on the cob contains roughly 100 calories and is a good source of fiber and essential vitamins. Each serving is both healthy and satisfying, making it a great choice for an outdoor meal or a refreshing summer snack. Remember, as with all foods, balance is key. Enjoy it as part of a diverse and nutritious diet.
Storing Tips & Variations
If you have leftover roasted corn, you can store it in an airtight container in the refrigerator for up to three days. Alternatively, you can freeze cooked corn for up to six months. When you’re ready to enjoy it again, simply reheat it in the oven or microwave.
Want to switch things up? Consider using spices like chili powder or herb blends for different flavors. You can also cut the corn off the cob after cooking and serve it in salads or as a taco topping.
Conclusion
Oven Roasted Corn on the Cob is not just a recipe; it’s a celebration of flavors that can bring loved ones together. With its simple preparation and delightful taste, it encourages you to embrace the joys of cooking and share the joy with your family and friends. So, gather your ingredients, follow this step-by-step guide, and enjoy every delectable bite!
FAQs
-
Can I use frozen corn for this recipe?
Yes, you can use frozen corn, but the cooking time may need to be adjusted since it will not have the same sweetness and texture as fresh corn. -
What can I do if I don’t have foil?
If you are out of foil, you can use an oven-safe baking dish covered with a lid or another oven-safe material to trap the steam. -
How do I know when the corn is done?
The corn is done when the kernels are tender and easily pierced with a fork. You can also taste a kernel to check for doneness. -
Can I add cheese to the corn?
Absolutely! A sprinkle of Parmesan or a dollop of cream cheese can add a delicious twist to your roasted corn. -
What’s the best way to serve corn on the cob to kids?
Cut the corn into smaller segments or serve it off the cob. You can also let kids roll the corn in butter and sprinkle their favorite seasonings for a fun, interactive experience!
Oven Roasted Corn on the Cob
Ingredients
Method
- Preheat your oven to 400 degrees Fahrenheit.
- Prepare the corn by placing each ear in a foil pouch and rub the top with 1 tablespoon of butter. Optionally, sprinkle with salt and pepper.
- Seal the foil to create a secure pouch.
- Bake the sealed pouches on a sheet pan for about 10 minutes.
- Turn the corn pouches to the opposite side and return to the oven for another 10-15 minutes until desired doneness.
- Carefully unwrap the pouches, allow to cool slightly, garnish with parsley if desired, and serve.

Leave a Reply